Using GMail just as you would do with Outlook, Thunderbird, or other email program to handle receiving ane sending your email is easy. Here's how we recommend setting up your email:
Step 1: CREATE A GMAIL ACCOUNT (if needed):
Create a GMail account, if you don't already have one. Go to https://www.gmail.com and follow their directions to create an account. Use any username/email address you wish, as nobody else will see it.
If you already have a GMail username and password, you can move on to the next step.
Step 2: FORWARD YOUR EMAIL IN CPANEL TO GMAIL:
- Log into your cPanel hosting control panel
- Click on the Forwarders icon (found in the Mail section of cPanel)
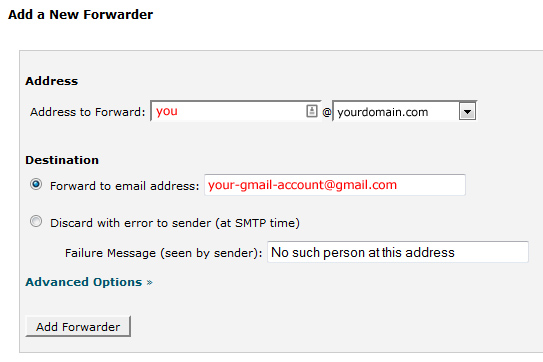
- Click Add Forwarder
- Enter in your email address that you want to use and enter in your GMail address. See example below:
Step 3: CREATE A SPECIAL SENDING-ONLY ACCOUNT IN CPANEL:
- Log into your cPanel hosting control panel
- Click on the Email Accounts icon (found in the Mail section of cPanel)
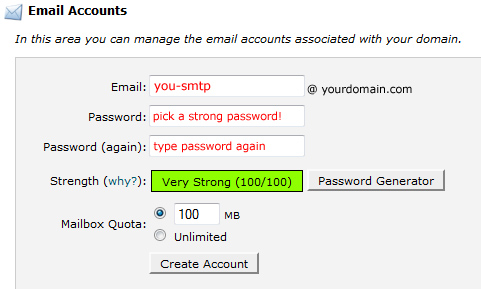
- Create a special account to use for sending e-mail We suggest if your regular address is you@yourdomain.com, that you create the sending email account as you-smtp@yourdomain.com (that is, add '-smtp' after your name). See our example below:
Step 4: CONFIGURE YOUR EMAIL IN GMAIL:
- Log into your GMail account at https://www.gmail.com
- Click the Gear icon (toward the top-right corner) then click the See all settings button.
- Click Accounts on the tab menu (toward the top of the page under the Settings heading)
- In the Send mail as: section, click the Add another email address link.
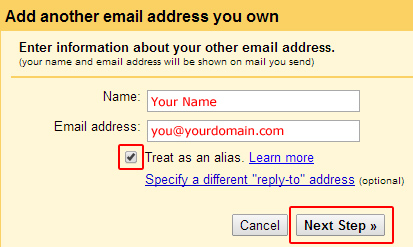
- Enter in your Name and your Email Address (the one with your domain name, not your GMail address), check the box for Treat as an alias and click Next Step.
- On the next screen, choose the option to Send through yourdomain.com SMTP servers.
- For the SMTP Server, enter in mail.yourdomain.com (of course, use your own domain name).
- For the Username and Password, enter in the special sending-only email address and password you created in cPanel in Step 3, i.e. you-smtp@yourdomain.com.
- Change the Port to 465 and choose the Secured connection using SSL option.
- Click the Add Account button.

Step 5: CONFIRM AND VERIFY YOUR NEW EMAIL ADDRESS:
Gmail will test the settings of your new account for sending e-mail. If successful, it will send you a "Confirmation Code". You will need to minimize this window (or move it out of the way) and return back to your GMail Inbox. You can also open another browser tab and go to your Gmail Inbox. Wait for the email message from GMail to arrive. Once it does, copy the code from the e-mail and paste it into the box in the open window you moved earlier and click "Verify". If you wish, you can also simply click the verify link right from the e-mail.
Step 6: MAKE YOUR NEW EMAIL ADDRESS THE DEFAULT IN GMAIL:
Click the Gear icon (toward the top-right corner), then click Settings, then click Accounts, then click "Make Default" next to the new email account you created (your domain, not the GMail address). You may want to leave the option checked to "Always reply from default address" so that no matter what address an incoming email was sent to, you always reply as from your email address with your domain name and not with your GMail email address. However, if you want to intermingle and use both addresses, leave this setting to "Reply from the same address the message was sent to".
